



Installing RamTV on Hostinger (hPanel)
hPanel setup, PHP, files, database, and cron
This guide installs RamTV on a Hostinger Web or Cloud hosting plan managed with hPanel. It covers hPanel's PHP Configuration, File Manager, MySQL database, SSL, and Cron Jobs screens. Follow it with RamTV's standard installation steps. A Hostinger VPS is self-managed; use our Ubuntu VPS guide for that. Hostinger AI Builder sites do not expose the File Manager and PHP controls used here.
Before you start
- Have the complete RamTV release package, purchase code, final domain or subdomain, and a Hostinger Web or Cloud plan that offers PHP 8.3 or newer (RamTV requires it), extensions, MySQL database, and scheduled task.
- Review RamTV's Requirements before choosing the plan. Hostinger's cron limits and your plan's CPU, memory, upload, and disk limits affect media workloads.
- Hostinger says FFmpeg is supported only on VPS. If your RamTV workflow depends on on-server audio or video conversion, choose a VPS instead of assuming a Web or Cloud plan can provide it.
1. Open hPanel and choose PHP
In Hostinger, go to Websites → Dashboard for the RamTV site. Search the sidebar for PHP Configuration. Select PHP 8.3 or newer (RamTV requires it), then check the PHP extensions tab against RamTV's Requirements page. Enable missing installed extensions and save. The PHP options tab holds upload limits, memory limit, execution time, and disabled functions. Hostinger's PHP version and extensions and options guides show the current controls.
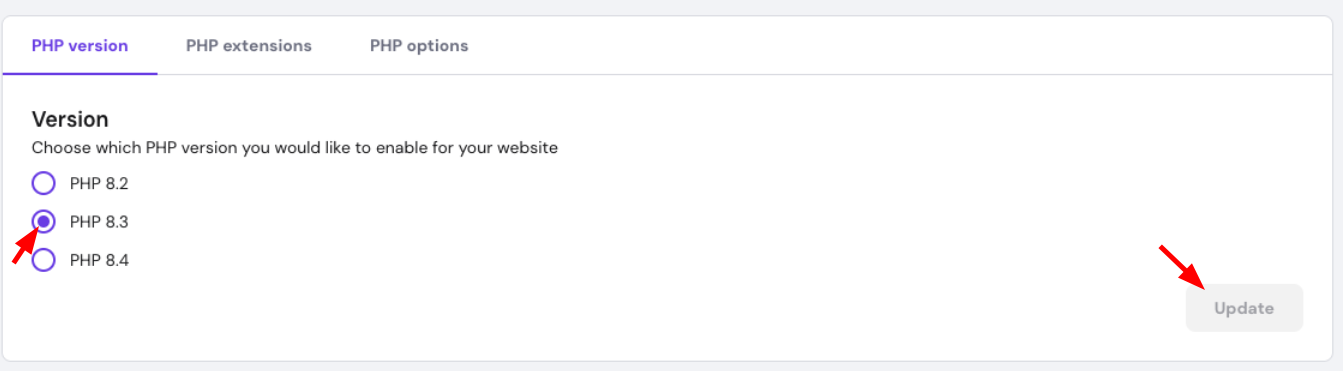
Select the PHP version for the hosting plan. Screenshot: Hostinger Help Center.
Hostinger says a plan-level PHP change can affect other sites on that plan, so check their compatibility first. Use hPanel's PHP Info and RamTV's installer checks to confirm the effective version and extensions. Change PHP settings in hPanel rather than modifying RamTV's supplied .htaccess, whose contents the installer verifies. If an RamTV feature needs a disabled process function, review Hostinger's disabled-functions guide and enable only the function required for that feature.
2. Upload RamTV to the site root
Open Websites → Dashboard → File Manager for the chosen site. Hostinger's File Manager guide explains the current layout. Use the website's public_html directory, not the higher-level account directory. Upload the RamTV ZIP, select it, and extract it. The root must directly contain index.php, api/, admin/, and installer/; move them out of any extra extraction folder.
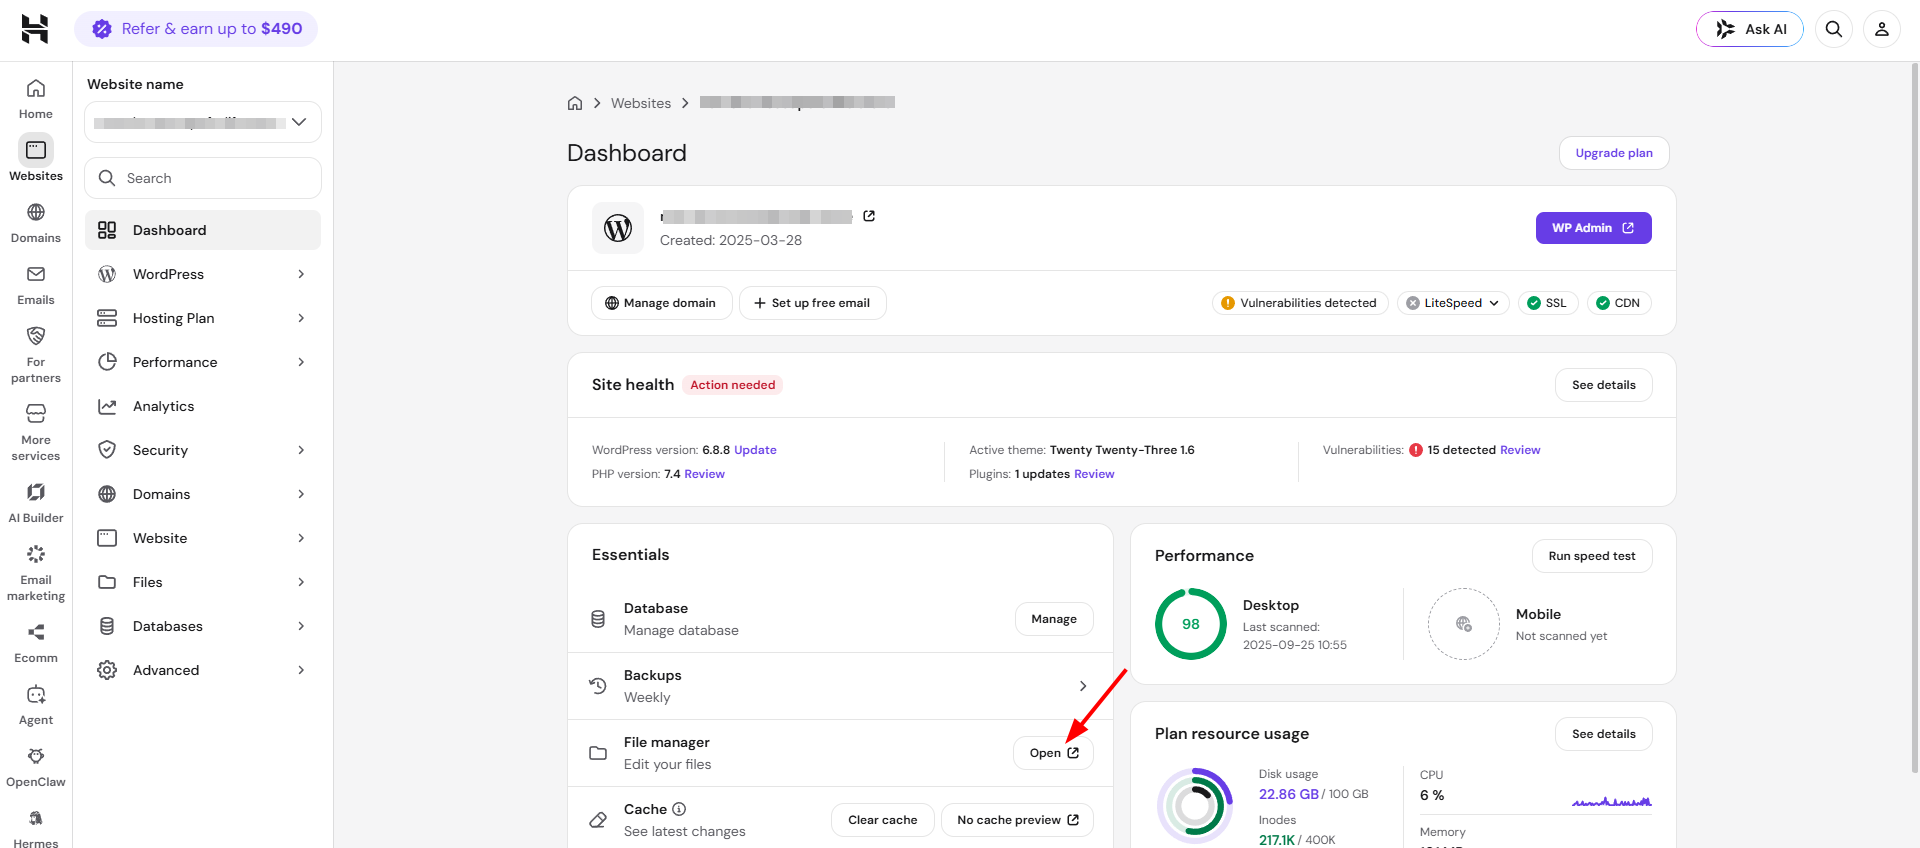
Open the site's File Manager from its Dashboard. Screenshot: Hostinger Help Center.
After extraction, confirm that the hidden .htaccess files supplied with RamTV were uploaded. Hostinger's 403 troubleshooting recognizes rewrite rules in .htaccess. RamTV's installer checks both file contents and rewrite behavior, so keep its originals intact. If an existing site has its own .htaccess, back it up before replacing that site with RamTV.
3. Create MySQL and enable HTTPS
In the site Dashboard, open Databases → Management. Choose the correct website, then create an empty MySQL database and user with a strong password. Save the complete database name and username, including Hostinger's fixed account prefix. Hostinger's database guide shows that the database is assigned to the selected domain. Enter its actual host, name, user, and password in RamTV's Database step.
Hostinger's Web and Cloud plans include SSL for domains and subdomains added to the plan, according to its SSL guide. Confirm that the final hostname opens with a valid https:// certificate before entering RamTV's site URL. If Cloudflare manages DNS, point its A record for @ or the chosen subdomain to the Hostinger hosting IP and preserve mail records. Hostinger's Cloudflare instructions and our Cloudflare DNS walkthrough show the process. Keep the RamTV record DNS only during installation.
4. Set up RamTV's scheduled task
RamTV's Server step displays the command for its background task. In hPanel, open Websites → Dashboard → Cron Jobs. Choose Custom, because RamTV passes bof_cronjobs=yes to its PHP script; Hostinger's PHP job type accepts only a PHP file path. Select a once-per-minute schedule if your plan offers it and save. Hostinger documents the job types and scheduler.
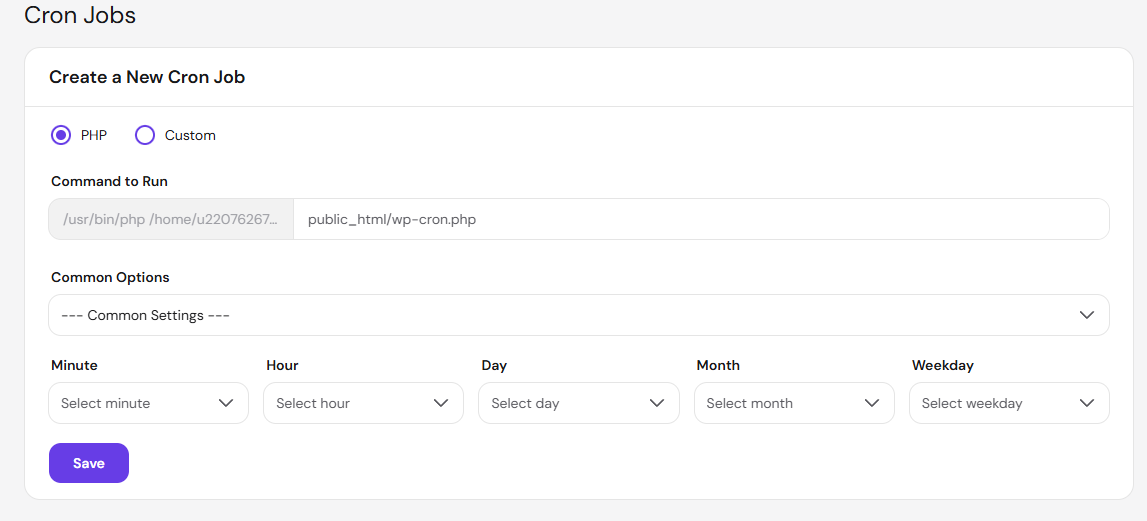
Choose the cron schedule in hPanel. Screenshot: Hostinger Help Center.
Hostinger's path guide shows that the full website root may be /home/u123456789/domains/example.com/public_html or /home/u123456789/public_html; find your own under FTP Accounts. Its custom cron example uses /usr/bin/php. Enter RamTV's real path and argument, such as:
/usr/bin/php -f /home/u123456789/domains/example.com/public_html/api/admin.php bof_cronjobs=yesIf hPanel rejects that Custom command, follow Hostinger's shell-wrapper instructions and put the same PHP command in a private .sh file outside public_html. Make sure the CLI PHP is a version RamTV supports. Hostinger's schedule uses UTC; this does not change an every-minute schedule. Let the task run and use hPanel's cron output plus RamTV's Server check to confirm it executed.
5. Finish and check your plan
Complete RamTV's installer, verify the licence and API routes, then remove the installer directory as instructed in First run. Open the public site and admin area over HTTPS, upload a representative media file, and confirm the scheduled task remains healthy. Keep backups of both the files and the database, and make a restore plan before accepting real content.
For image optimisation, Hostinger documents gifsicle and libwebp tools on Web and Cloud plans, but check the executable paths and PHP process-function settings before enabling RamTV's optional integrations. The RamTV Ubuntu guide explains the optional tools and their admin settings for a VPS. A Web or Cloud plan does not provide the same package control as a VPS, and Hostinger explicitly reserves FFmpeg support for VPS hosting.