



Installing on Plesk
Extensions, PHP settings and scheduled tasks under Plesk
Use Plesk for the hosting setup and RamTV's installer for the application setup. This guide is for Plesk Obsidian on Linux with the usual Apache and nginx proxy setup; menu names and permissions can vary by subscription. Follow it alongside the standard RamTV installation steps.
Before you begin
- Add the domain or subdomain in Websites & Domains, point DNS to the server, and confirm its document root in Hosting Settings. Plesk commonly uses
httpdocsfor a domain, but a custom root can differ. - Download your RamTV package and purchase code. Create a ZIP containing the contents of its
scriptfolder, including hidden.htaccessfiles. The Upload step shows the required layout. - Use an empty MySQL or MariaDB database. RamTV's Requirements step checks cURL, MySQLi, mbstring, GD, ZIP,
allow_url_fopen, and PHP 8.3 or newer (RamTV requires it).
1. Configure PHP and the web server
In Websites & Domains, select the domain and click PHP or PHP Settings. Choose PHP 8.3 or newer (RamTV requires it) and a handler available to your subscription, then save. If required modules are missing, contact the Plesk administrator: domain-level PHP settings may be available to you, while extension enablement is managed by the server administrator for that PHP version. See Plesk's domain PHP guide and extension settings.

Plesk domain PHP version selector. Source: official documentation.
Keep Apache proxy mode enabled for the domain, or use an Apache-served PHP handler. RamTV requires its supplied .htaccess rewrite and access rules. Plesk can serve PHP directly through nginx, which ignores .htaccess; that configuration can fail RamTV's installer check. Check Apache & nginx Settings with your host if the routes fail. See Plesk's PHP handler guidance.
2. Upload to the document root
Open Websites & Domains → your domain → File Manager and enter httpdocs, or the custom document root shown in Hosting Settings. Choose Upload File and upload the prepared ZIP. Select the archive, click Extract Files, and confirm extraction into the document root. Plesk documents this flow in its quick-start tutorial.
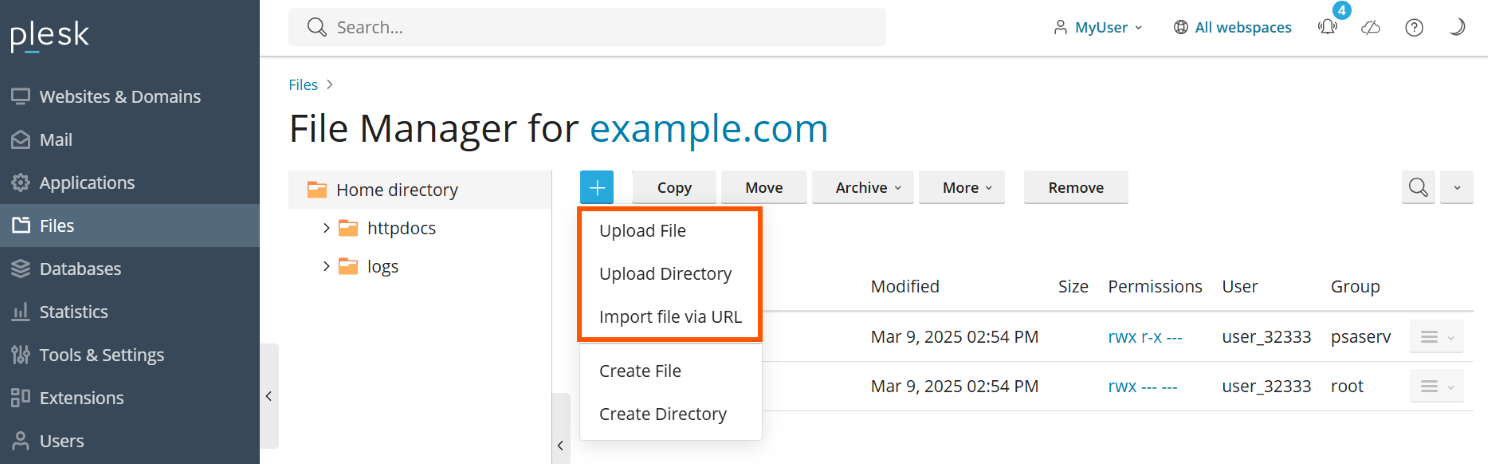
Plesk File Manager upload interface. Source: official documentation.
The document root should now contain index.php, api/, admin/, and installer/ directly. If they are nested in an extra script/ folder, move its contents up. Confirm the root .htaccess and protected copies under the application folders are present. RamTV checks their exact contents, so do not edit them. Remove the upload ZIP after extraction.
3. Create the database
Open Websites & Domains → Databases → Add Database. Choose MySQL or MariaDB, name the database, associate it with the RamTV site, and create a database user with a strong password. Save the full database name, username, password, and database server address shown by Plesk. The database needs a user with access; see Plesk's database guide.
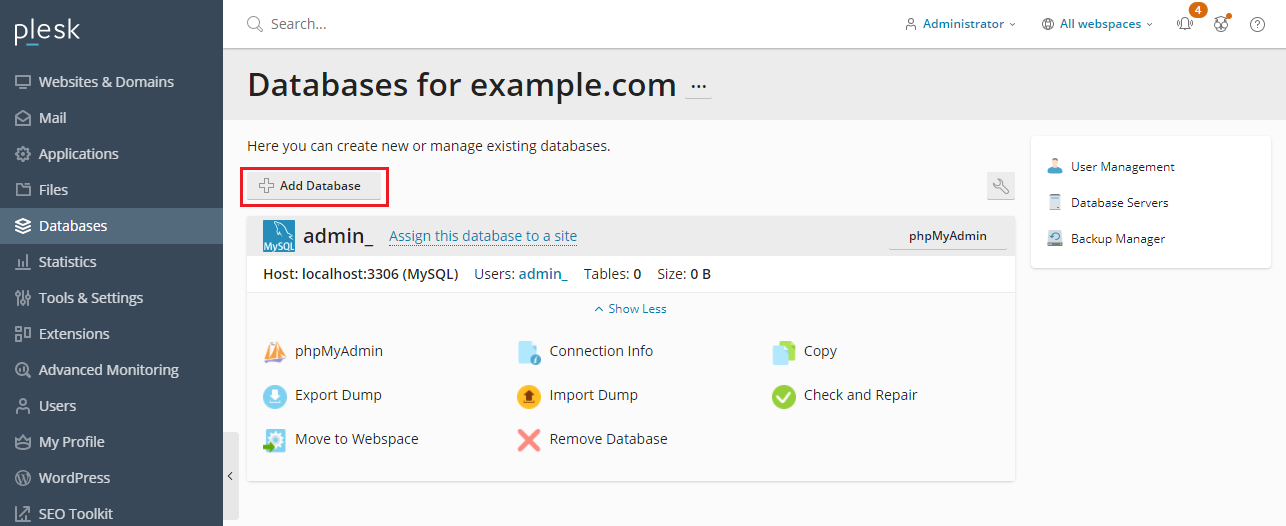
Plesk Add Database screen. Source: official documentation.
Enter those values in RamTV's Database step. Use the host address Plesk provides rather than assuming localhost. Let RamTV import its tables into the empty database.
4. Secure the domain and run the installer
Open the domain's SSL/TLS Certificates control and install or confirm a valid certificate, such as the free certificate offered through Plesk's SSL It! extension. Make sure DNS points to this server before requesting the certificate. Continue only when https://your-domain.com opens without a browser warning. See Plesk's SSL/TLS guidance.
Visit https://your-domain.com/installer/ and follow RamTV's License and Database steps. Enter the HTTPS address you intend to keep when RamTV asks for the web address; the purchase certificate is tied to it.
5. Schedule RamTV's PHP task
RamTV's Server step shows a command ending with bof_cronjobs=yes. In Plesk, open Websites & Domains → Scheduled Tasks → Add Task. Select Run a PHP script, choose the same PHP version as the website, select the script httpdocs/api/admin.php (or locate api/admin.php under your custom document root), and enter bof_cronjobs=yes in the separate with arguments field. The field must contain the argument exactly, without php -f. Set Run to Cron style, enter * * * * * to run every minute, and save. Plesk confirms this schedule.
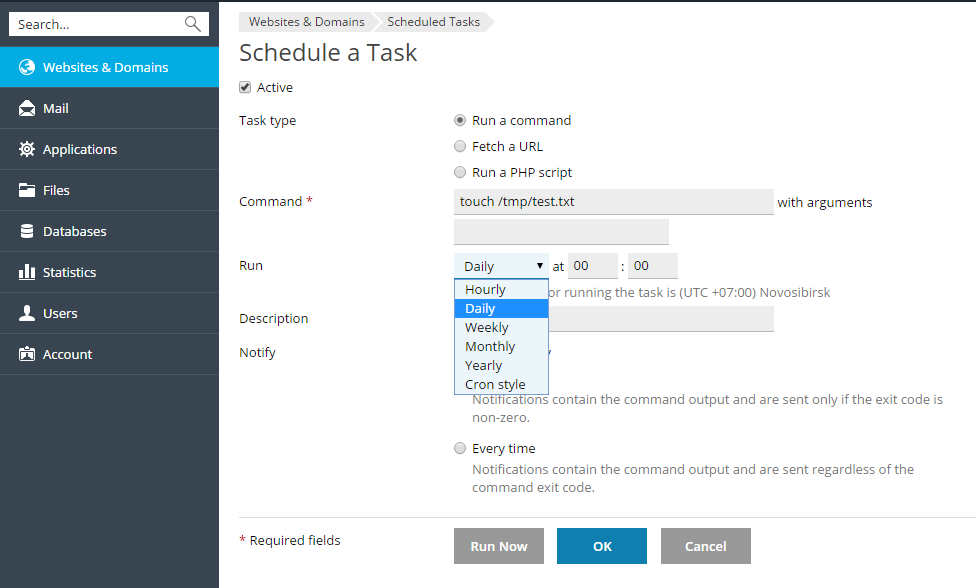
Plesk Scheduled Tasks Add Task screen. Source: official documentation.
Plesk's Scheduled Tasks guide describes the PHP task type, and its PHP task example shows the separate arguments field. Click Run Now once, then let the job run on its schedule. Return to RamTV's Server step after a minute or two to check the cron heartbeat.
If your provider does not expose the PHP script task or the arguments field, ask them to schedule RamTV's exact installer command for the subscription. Plesk's Run a command task may be restricted by a chrooted shell, so a bare php or an external PHP binary can fail even when the website works. Plesk documents this restriction. Avoid using Fetch a URL for RamTV's private CLI task.
Finish and troubleshoot
- If
/installer/returns 404, confirm the actual document root and remove an accidental extrascript/directory level. - If the server check says
.htaccessis missing or corrupted, restore the original files from the RamTV package. If routes fail with the files present, verify Apache proxy mode and the PHP handler; nginx-only delivery ignores those rules. - If cron stays red, confirm the PHP script path,
bof_cronjobs=yesargument, every-minute schedule, task output, and selected CLI PHP version. Plesk's PHP task may not inherit custom domain PHP directives, so ask the host if it lacks a needed option. - When installation succeeds, remove
installer/and the uploaded ZIP. Continue with First run.