



Installing on cPanel
File Manager upload, the PHP selector and the cron UI
Use cPanel for the hosting setup and RKHM's installer for the application setup. This guide follows the standard RKHM installation steps. Panel names can vary by cPanel version and by the features your provider enables.
Before you begin
- Add your domain or subdomain to the cPanel account and point its DNS at the hosting server. In Domains, confirm its actual document root; the primary domain usually uses
public_html, while another domain may use a different folder. - Download the RKHM package and purchase code. Make a new ZIP containing the contents of its
scriptfolder, including every hidden.htaccessfile. The standard Upload step explains this layout. - Have an empty MySQL or MariaDB database ready. RKHM checks for cURL, MySQLi, mbstring, GD, ZIP,
allow_url_fopen, and PHP 8.3 or newer (RKHM requires it since v2.1.04). Choose a PHP release that passes RKHM's Requirements screen; a minimum check alone does not confirm compatibility with every newer PHP release.
1. Select the domain's PHP version
Open Software → MultiPHP Manager, select the installation domain, choose PHP 8.3 or newer (RKHM requires it since v2.1.04), and click Apply. If this feature is absent, ask your provider how PHP is selected on your account. MultiPHP Manager sets the version per virtual host; it does not install missing extensions for you. See cPanel's PHP version instructions.
If the RKHM Requirements screen later reports a missing module, ask your provider to enable it for the selected PHP version. cPanel documents extension installation in EasyApache 4. Check allow_url_fopen in the domain's PHP configuration as well.
Keep RKHM's supplied .htaccess files intact. The installer checks their exact contents. cPanel can add PHP handler rules to .htaccess when changing a domain's PHP version. Set the version before extracting RKHM, then check both the effective PHP version and the installer file-integrity result. If a later PHP change makes the installer report a corrupted .htaccess, ask the host to set the domain PHP version without changing RKHM's protected file and restore that file from the original package; do not remove its rewrite or access rules. cPanel explains PHP version rules in .htaccess.
2. Upload to the correct document root
Open Files → File Manager and enter the document root shown for your domain in Domains. For the primary domain this is usually /home/USERNAME/public_html. For an addon domain or subdomain, use the document root shown by cPanel instead of assuming public_html. Upload the prepared ZIP there, select it, and choose Extract.
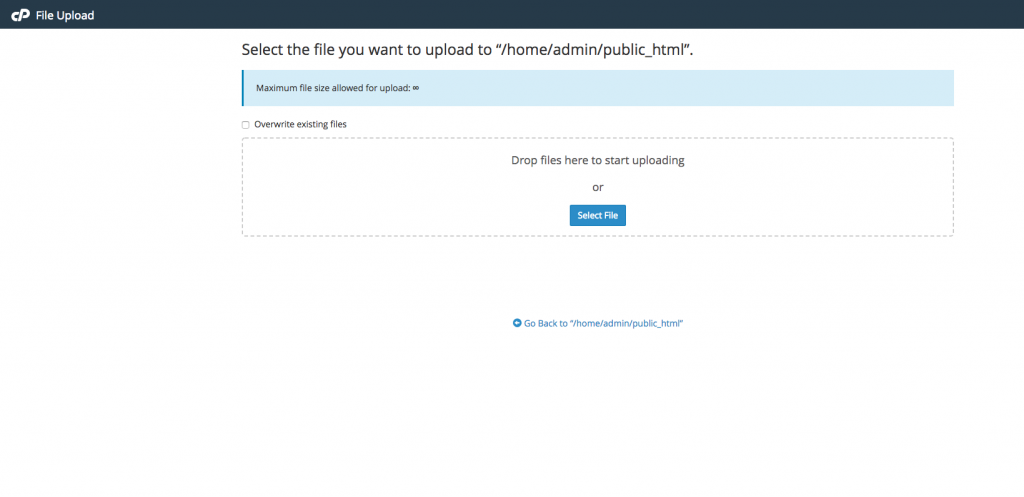
cPanel File Manager upload screen. Source: official documentation.
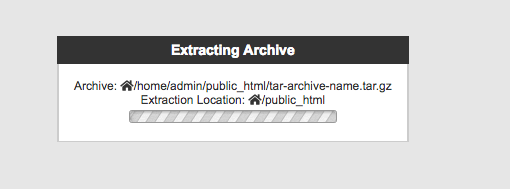
cPanel File Manager extraction screen. Source: official documentation.
The document root must contain index.php, api/, admin/, and installer/ directly. If extraction left them inside an extra script/ folder, move the contents into the document root. In File Manager, click Settings and enable Show Hidden Files (dotfiles) so you can confirm the root .htaccess and those under api/ and admin/. The RKHM installer also checks additional protected copies inside its framework. Do not edit these files. See cPanel File Manager.
3. Create the database
Open Databases → Database Wizard (called MySQL Database Wizard on some versions). Create a database, create a user with a strong password, and grant that user ALL PRIVILEGES on this database. Save the complete database and username shown by cPanel, including any account prefix. The wizard grants the new user access as part of its flow. See cPanel's database wizard guide.
In RKHM's Database step, enter those complete names, the saved password, and the MySQL host provided by your host. localhost is common for a local database, but use the provider's actual value. Let RKHM import its tables into this empty database.
4. Secure the domain and run the installer
Check Security → SSL/TLS Status or SSL/TLS Certificates for a valid certificate on the domain. Your provider may issue one through AutoSSL. Make sure DNS resolves to this server and wait until https://your-domain.com works without a browser warning. See cPanel's SSL guide.
Visit https://your-domain.com/installer/. Follow the standard License and Database steps. When asked for the site URL, use the HTTPS address you intend to keep; the purchase certificate is tied to that address.
5. Add the RKHM cron job
At RKHM's Server step, copy the command generated for your installation. In cPanel, open Advanced → Cron Jobs. Set Common Settings to Once Per Minute, or enter * in the Minute, Hour, Day, Month, and Weekday fields. Paste the command into Command and click Add New Cron Job. It has this shape:
/usr/local/bin/php -f /home/USERNAME/public_html/api/admin.php bof_cronjobs=yesUse your installer's real script path. /usr/local/bin/php is cPanel's CLI PHP launcher on EasyApache 4 systems; if your host uses a different PHP layout, ask for the CLI binary matching the website's PHP version. Do not use /usr/bin/php solely by guesswork because cPanel documents it as a CGI launcher. See cPanel's PHP CLI paths and Cron Jobs setup.
Let the task run for a minute or two, then refresh RKHM's Server step. If the cron check stays red, verify the schedule, full script path, and CLI PHP version. Check cron email or logs for errors. RKHM also checks the protected .htaccess files and that the rewrite rules work.
Finish and troubleshoot
- If
/installer/returns 404, recheck the domain's document root and remove an accidental extrascript/directory level. - If the installer says a
.htaccessfile is missing or corrupted, show dotfiles and restore the original file from the RKHM package. If cPanel's PHP selector rewrites it again, ask your host to configure PHP without changing that file. - If the homepage loads but other routes fail, confirm Apache is processing RKHM's original
.htaccessrules. A pure Nginx host needs equivalent rules; see the Nginx guide. - After installation succeeds, remove
installer/and the uploaded ZIP. Continue with First run.